Logo Placement Guide 

Find out which placements work best for your logos, artwork, and text-based designs. 

Top 8 Print Locations

Each print location has a standard size that we use when customers don't request a particular size. This may be adjusted slightly based on design and garments. 

1. LEFT CHEST

The classic, and the go-to location for your logo when you’re providing shirts for employees, or staff for an event, or anything really.

The size is tasteful; typically 3” to 4” wide, and around 3″ down from the collar. Placement can adjust to correspond with the size of the shirt, so it always looks right. On the left.

One of the trade-offs for this location is image detail. You want to avoid designs with a lot of detail because people won’t be able to see them. So keep it simple.

TIP! Pair it with a full back print for the classic combo. Simple branded Left Chest, and put the more detailed, colourful, or elaborate artwork for the back.

2. CENTRE CHEST

This is a moderately sized print, so it’s almost always fully visible, even if someone is wearing a jacket, hoodie, or open button-down shirt.

The size is typically larger than a Left Chest– but not quite as large as a Full Front.

If you were planning for a standard front print, you have a choice between this location and a Full Front (see below). The range of garment sizes in your order could help decide; if they skew smaller, especially into youth sizes, go with Center Chest. If they skew larger, into the 3XL range, you may want to go with a Full Front.

3. FULL FRONT

For certain designs, this size can look very large. And if you’re getting screen printing, you can end up with a lot of ink on the shirt, which can result in a heavy print that isn’t breathable, also known as a “sweat patch”, for obvious reasons.

This is when you want to think about your print area. In other words, the surface area that your design will cover, similar to the square footage of a house. If your design isn’t very tall, you can feel free to print it wide. If it’s a tall design, you may want to reduce the overall size.

4. OVERSIZED FRONT

An oversize print refers to any design that exceeds the dimensions of a standard full-front print. Our maximum print size is 16 inches wide by 20 inches high. The placement for these prints usually begins higher than a standard front print, approximately 2 to 3 inches down from the collar.

Please note that your garment size may limit the print dimensions. For instance, we cannot print 14 inches wide on youth sizes, smaller ladies' sizes, or styles like tank tops and v-necks. In such cases, you would need to set up two different print sizes.

5. NECK YOKE

The average size is smaller than a Left Chest, typically 2” to 3” wide, so keep the design simple. Placement is about 1” from the edge of the collar.

We've successfully used logos and designs as small as 1 inch in this location. You may have noticed this placement while standing in line behind someone—it's right at eye level, so it doesn't need to be large.

This size is also ideal for the small area on racerback tank tops, making it perfect for orders that include those. The same design can also be printed on the sleeve or left chest, as they are similarly sized areas.

6. UPPER BACK

This is the spot where you'll often see bold words like "SECURITY" or "EVENT STAFF," or even the hashtag of the moment.

The print size is typically 12 to 13 inches wide to ensure it’s readable from across a crowd. If your design is just text, you don't need to specify "Upper Back"—we’ll position it correctly, about 3.5-4 inches down from the collar.

Some customers occasionally request this to be printed across the bottom of the shirt. While it's an option for promotional tees and does catch the eye, it doesn’t have the same visibility as the upper back area.

7. FULL BACK

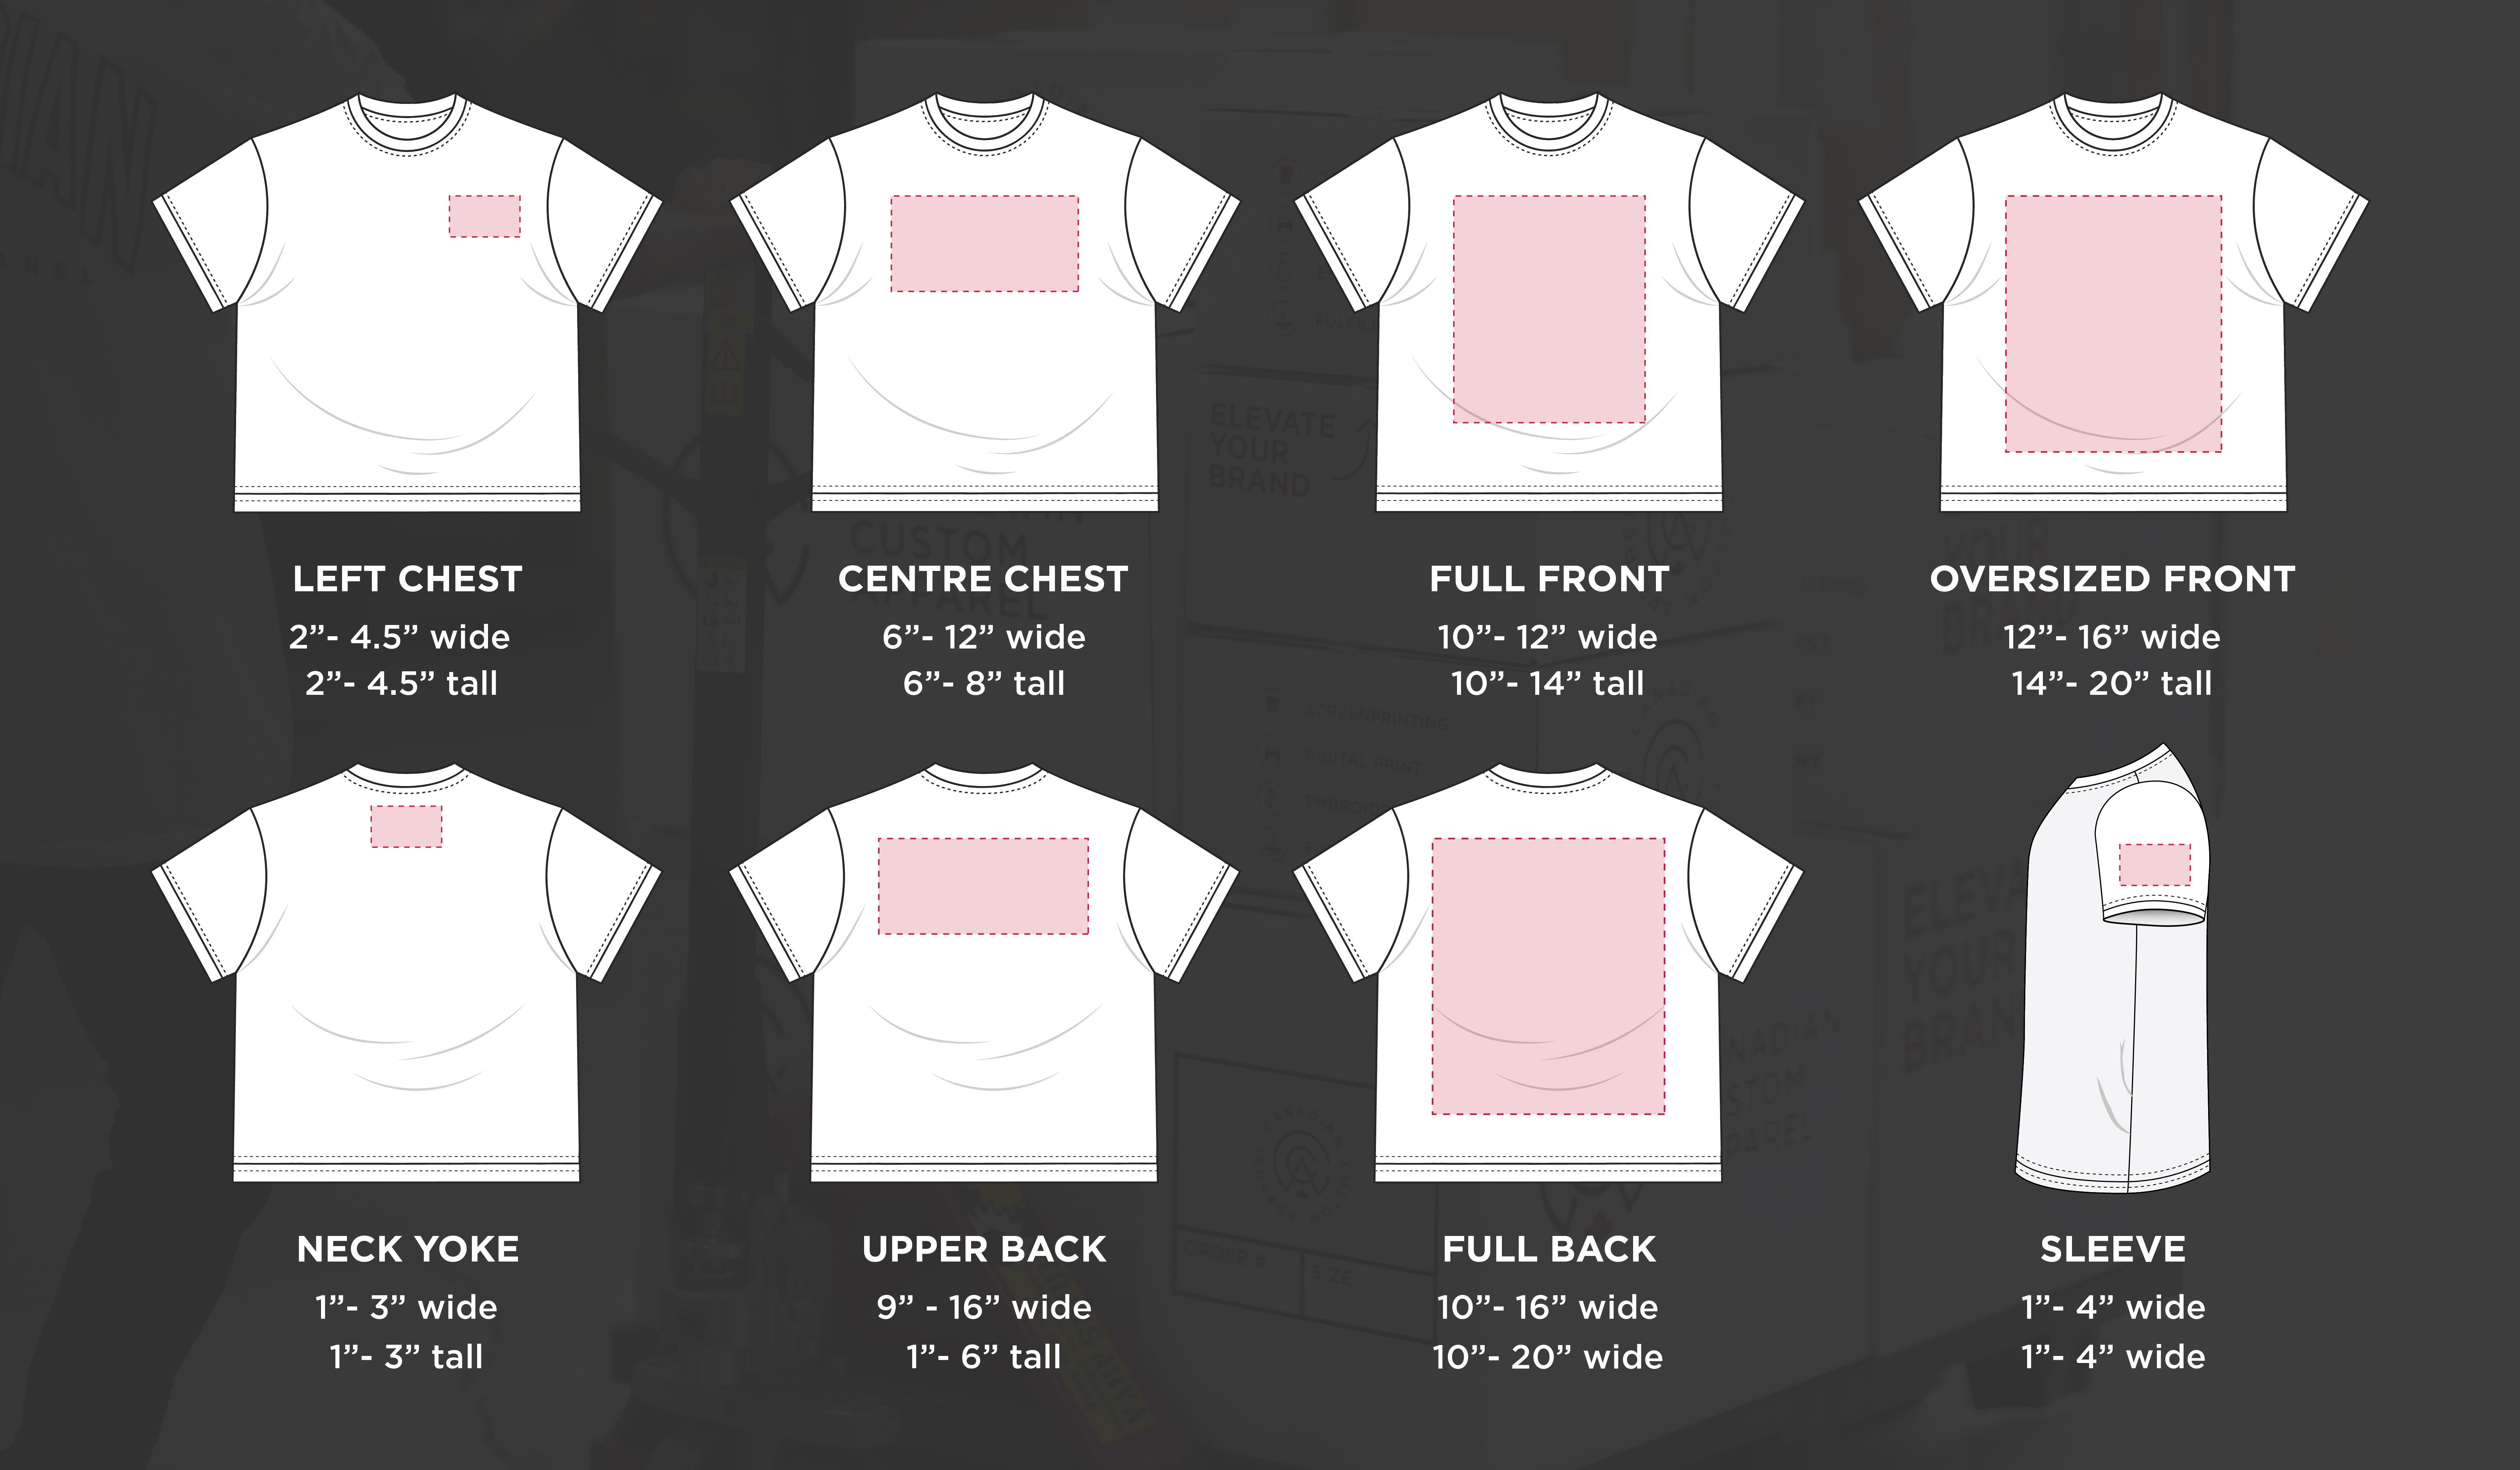
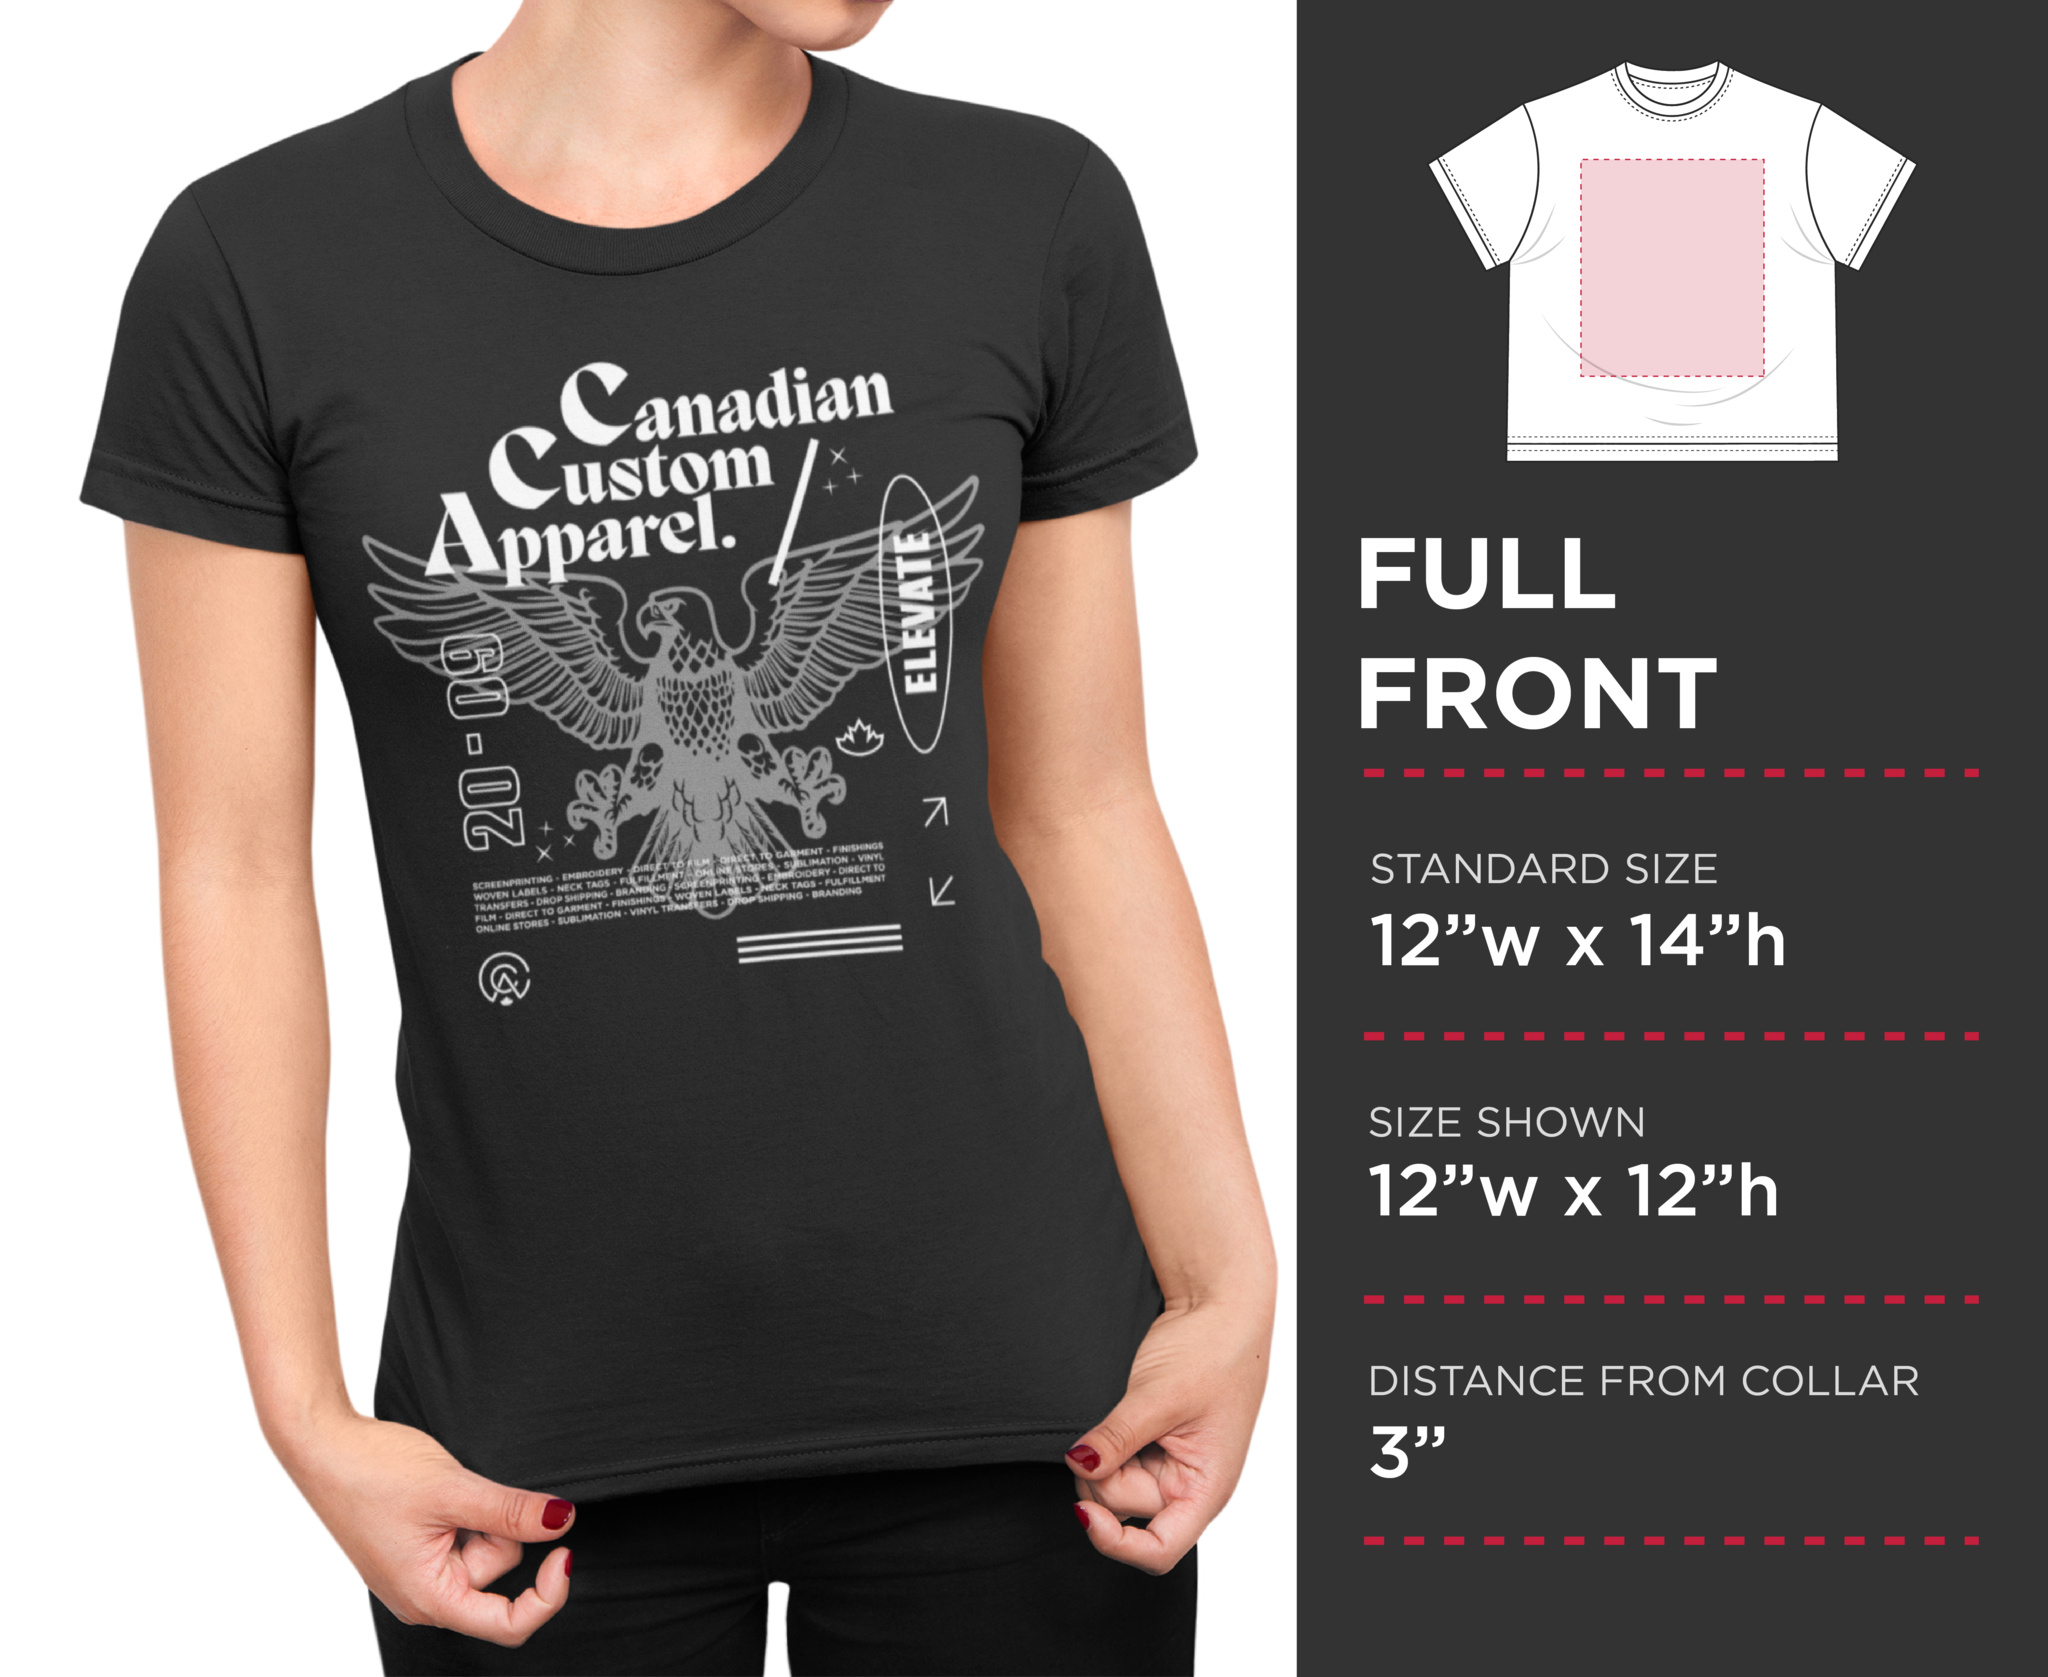
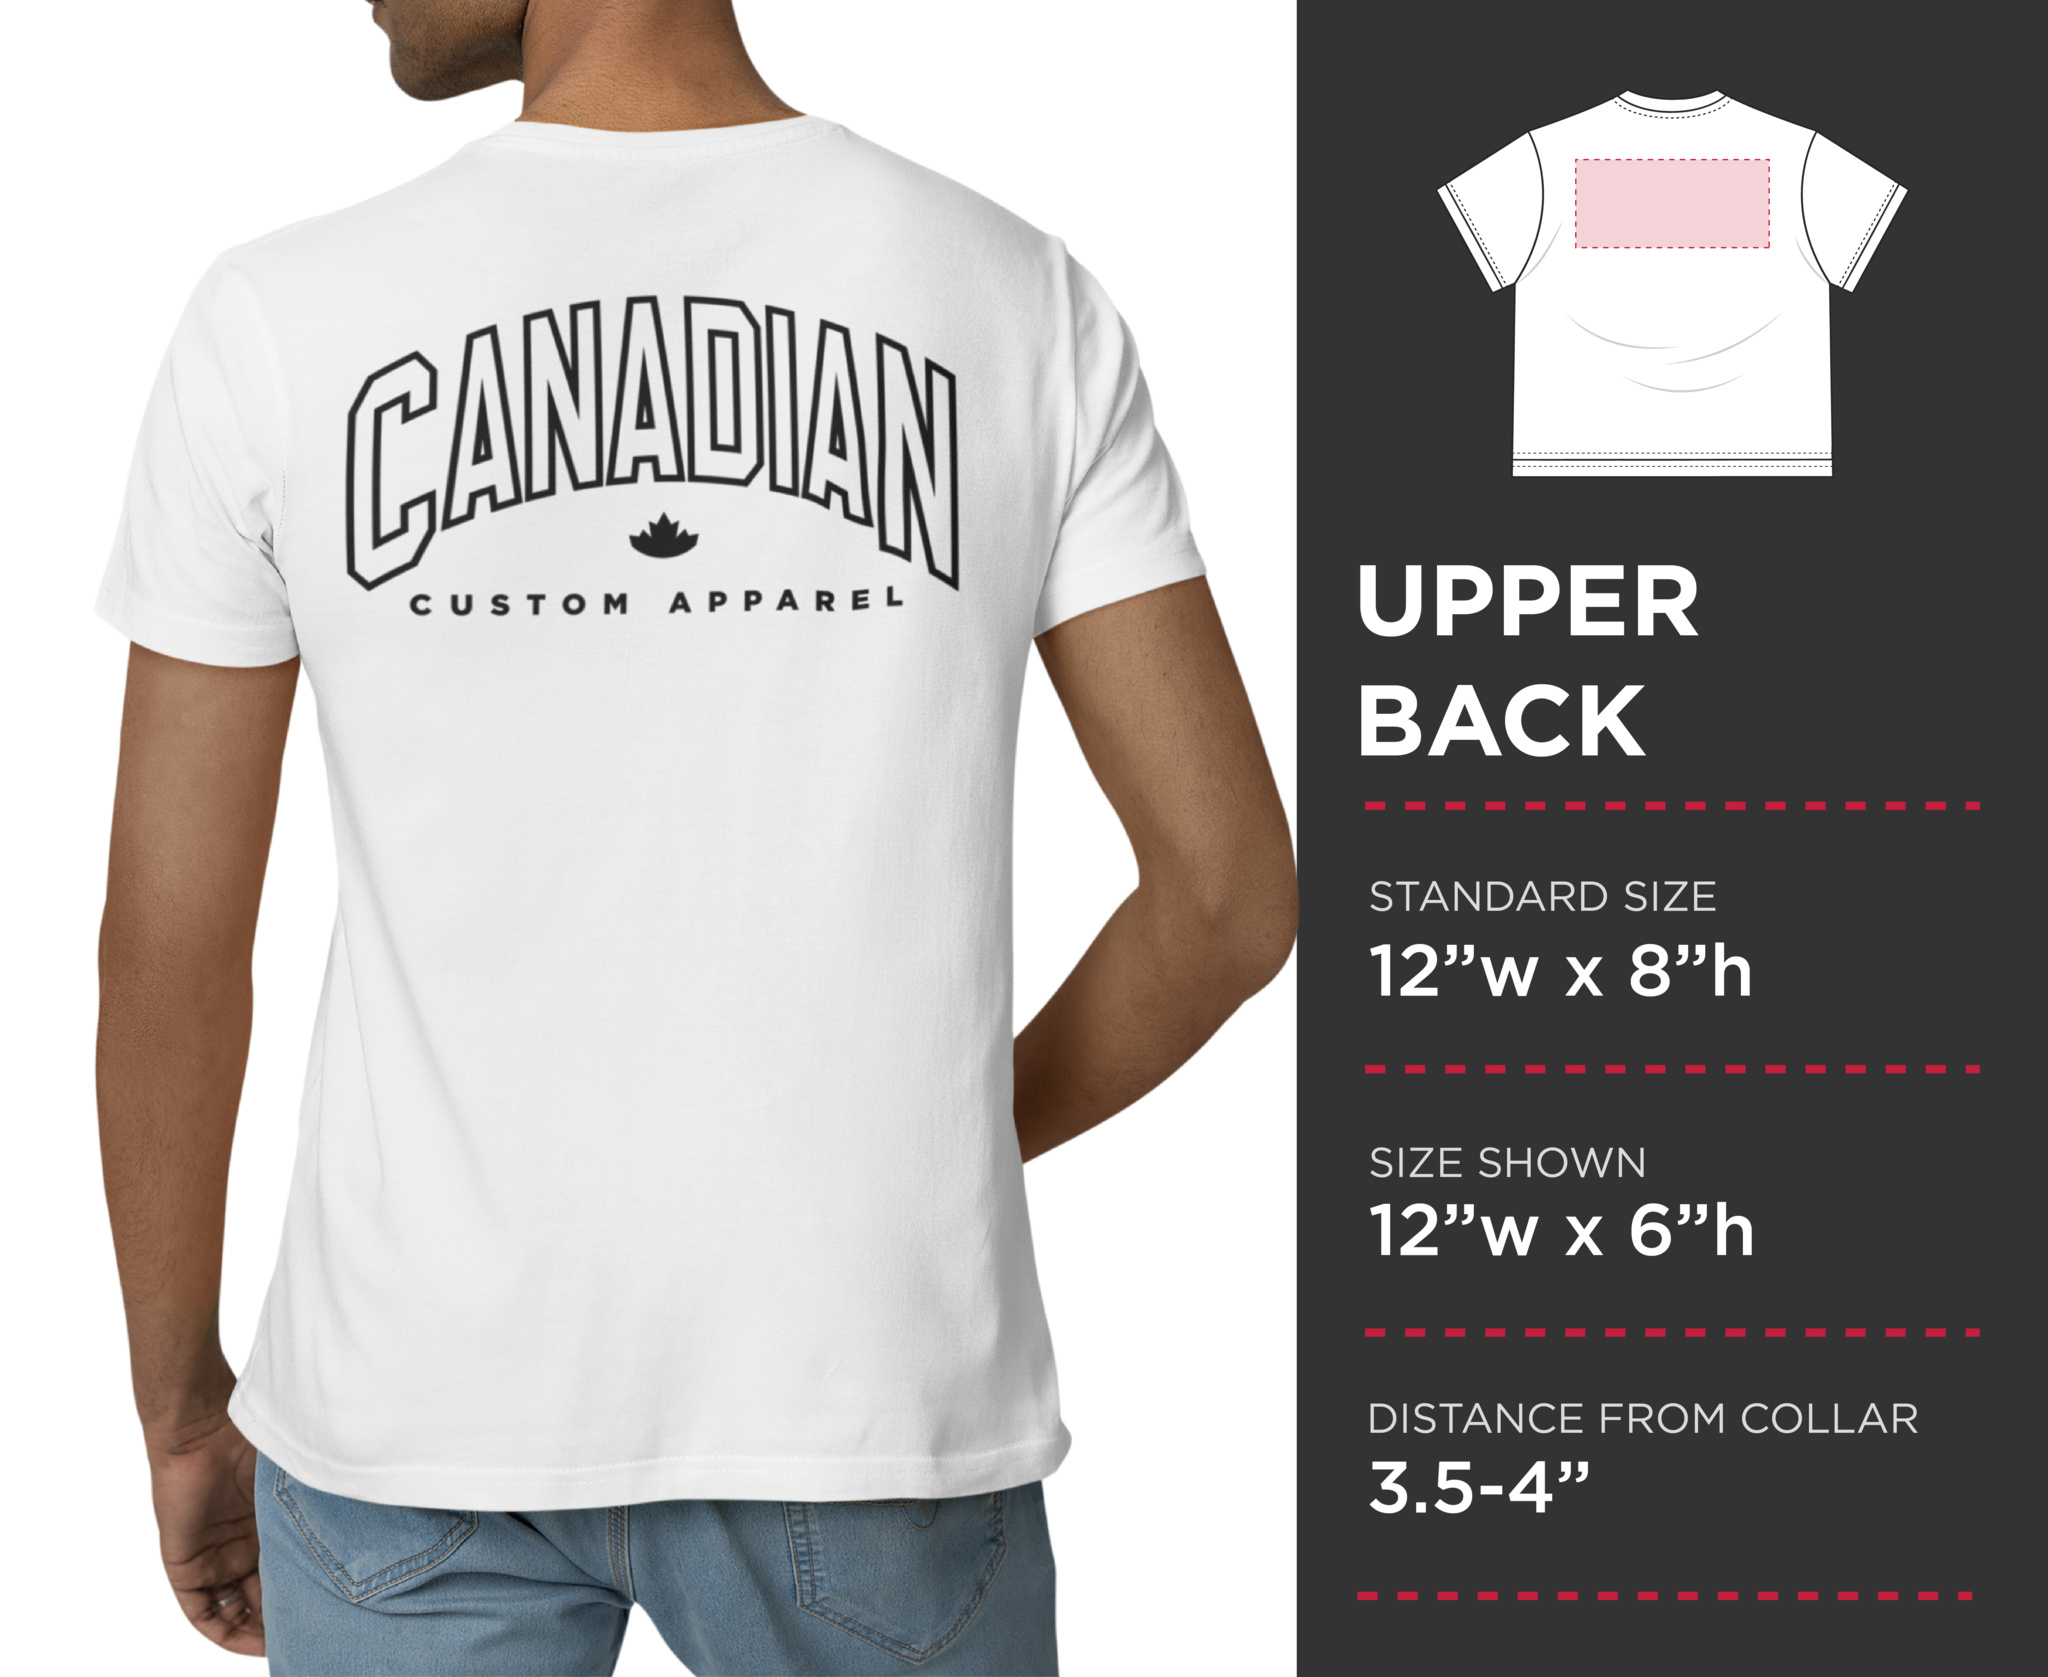
Typically, the standard print size of 12 inches wide by 14 inches high is more than sufficient, but we can go up to 14.5 inches wide by 16.5 inches high if needed—provided the garments aren't too small.

This print location is rarely used on its own and is usually paired with a print on the front, sleeves, or both.

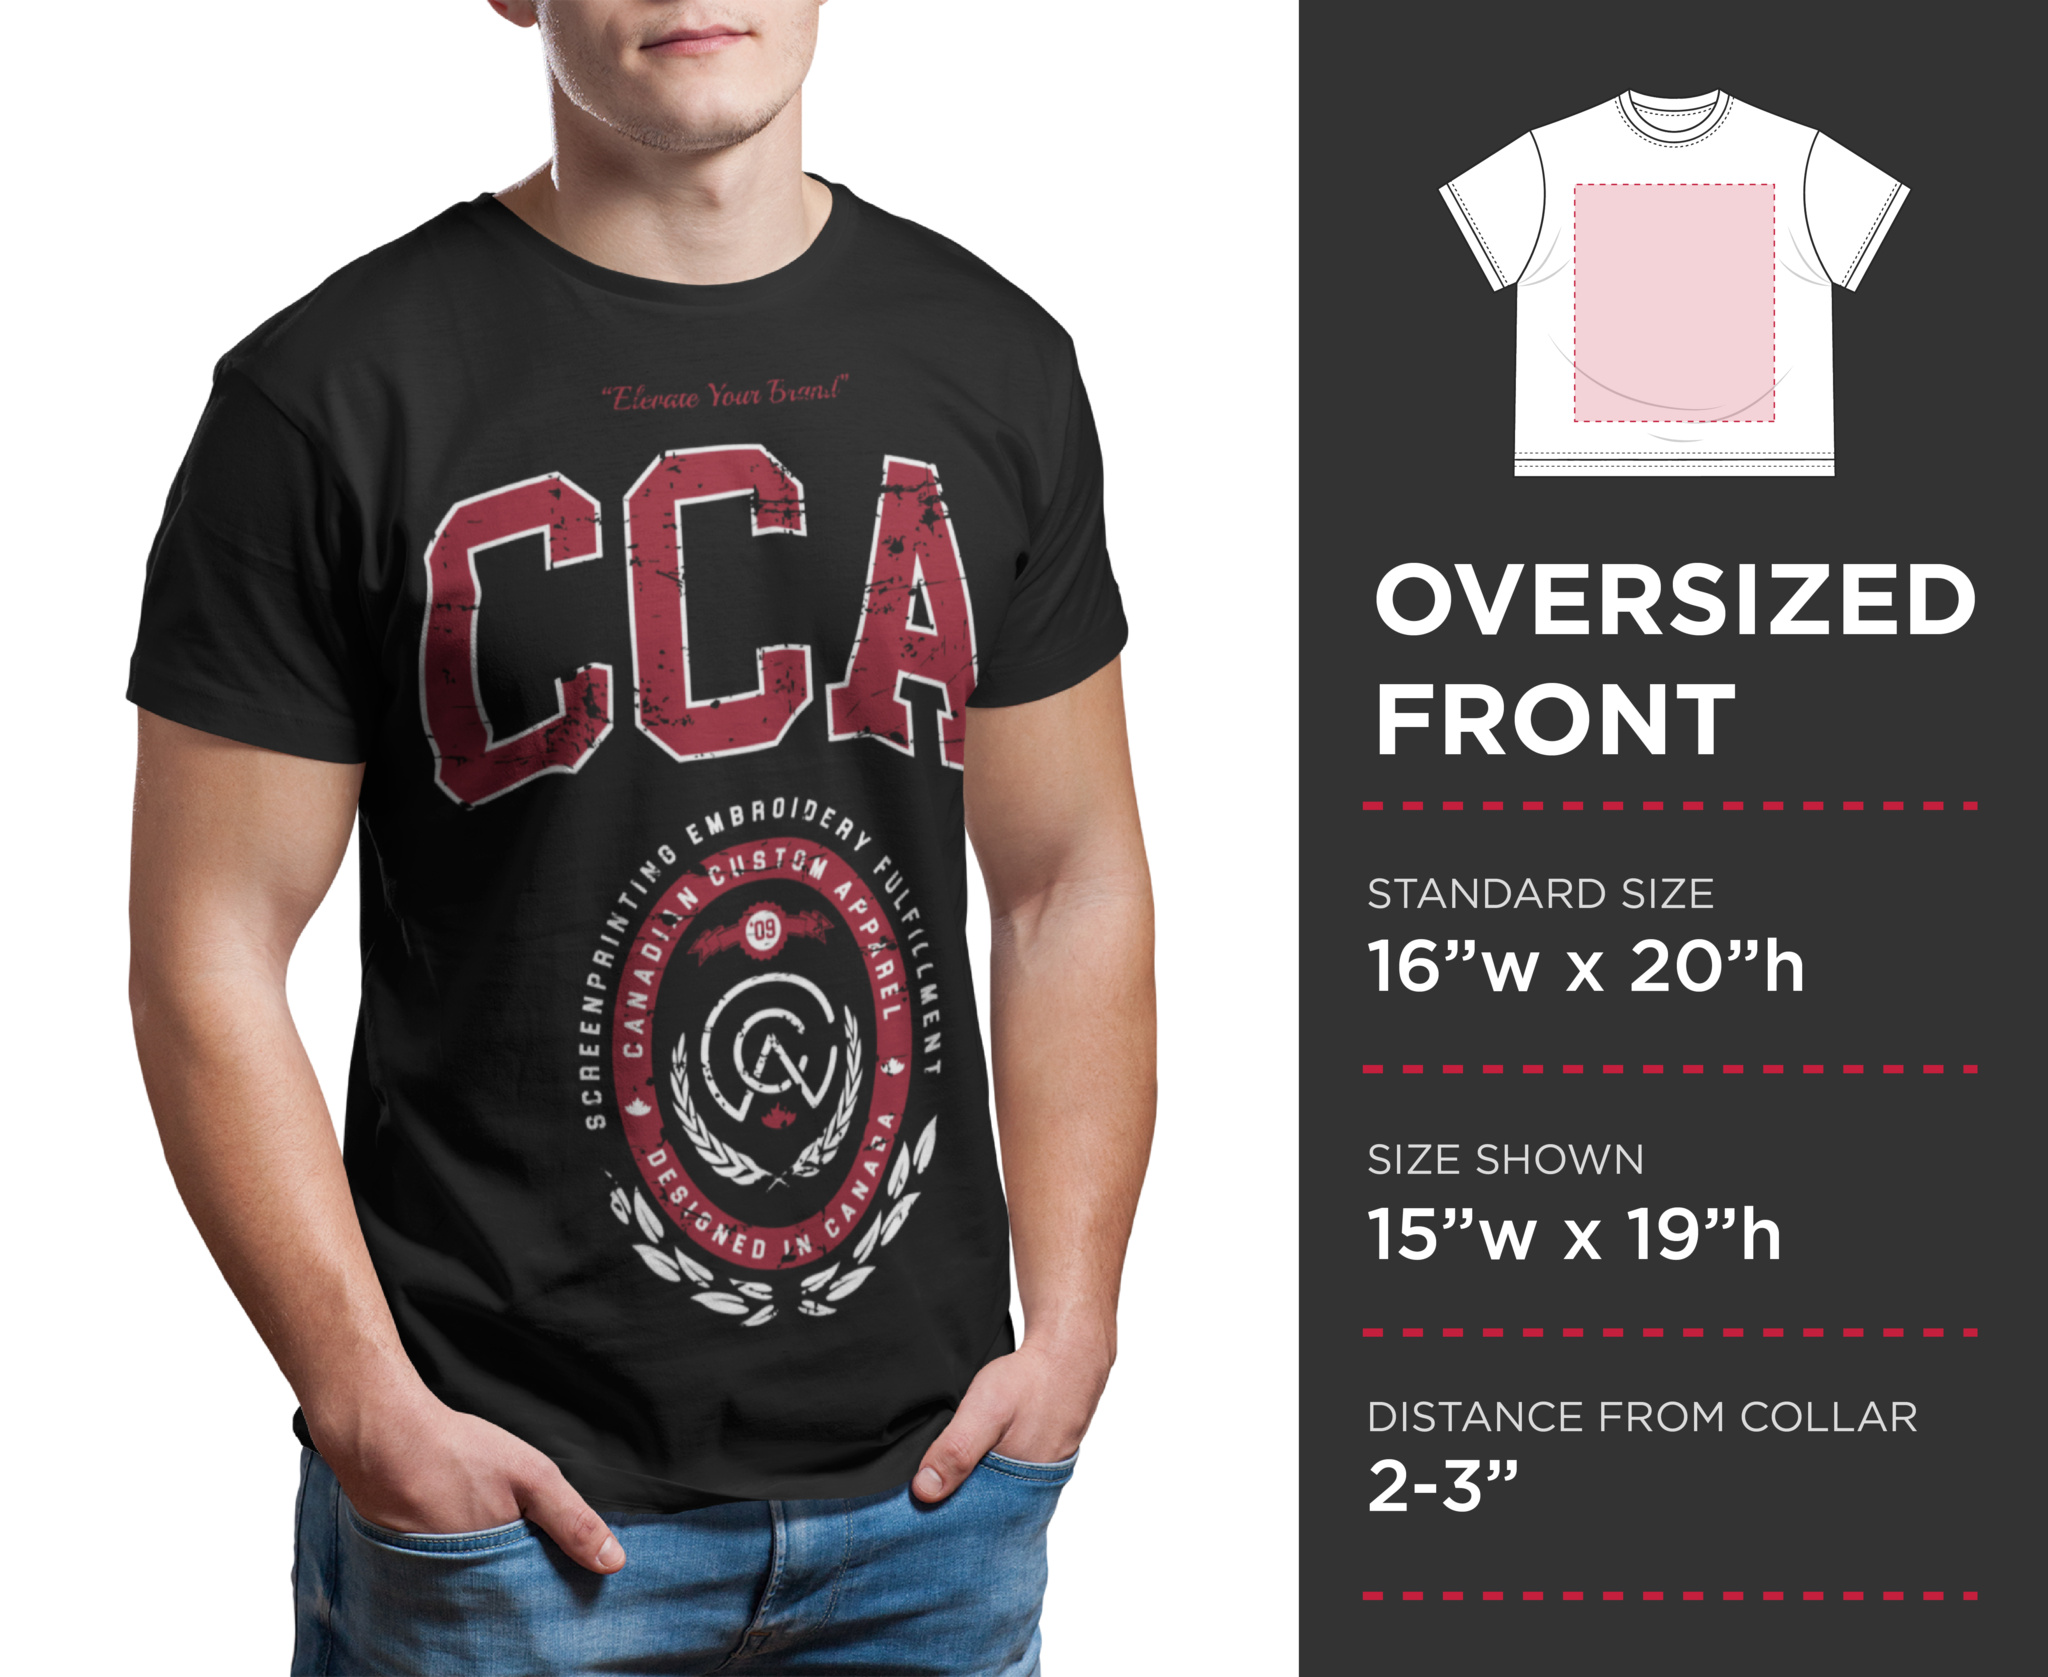
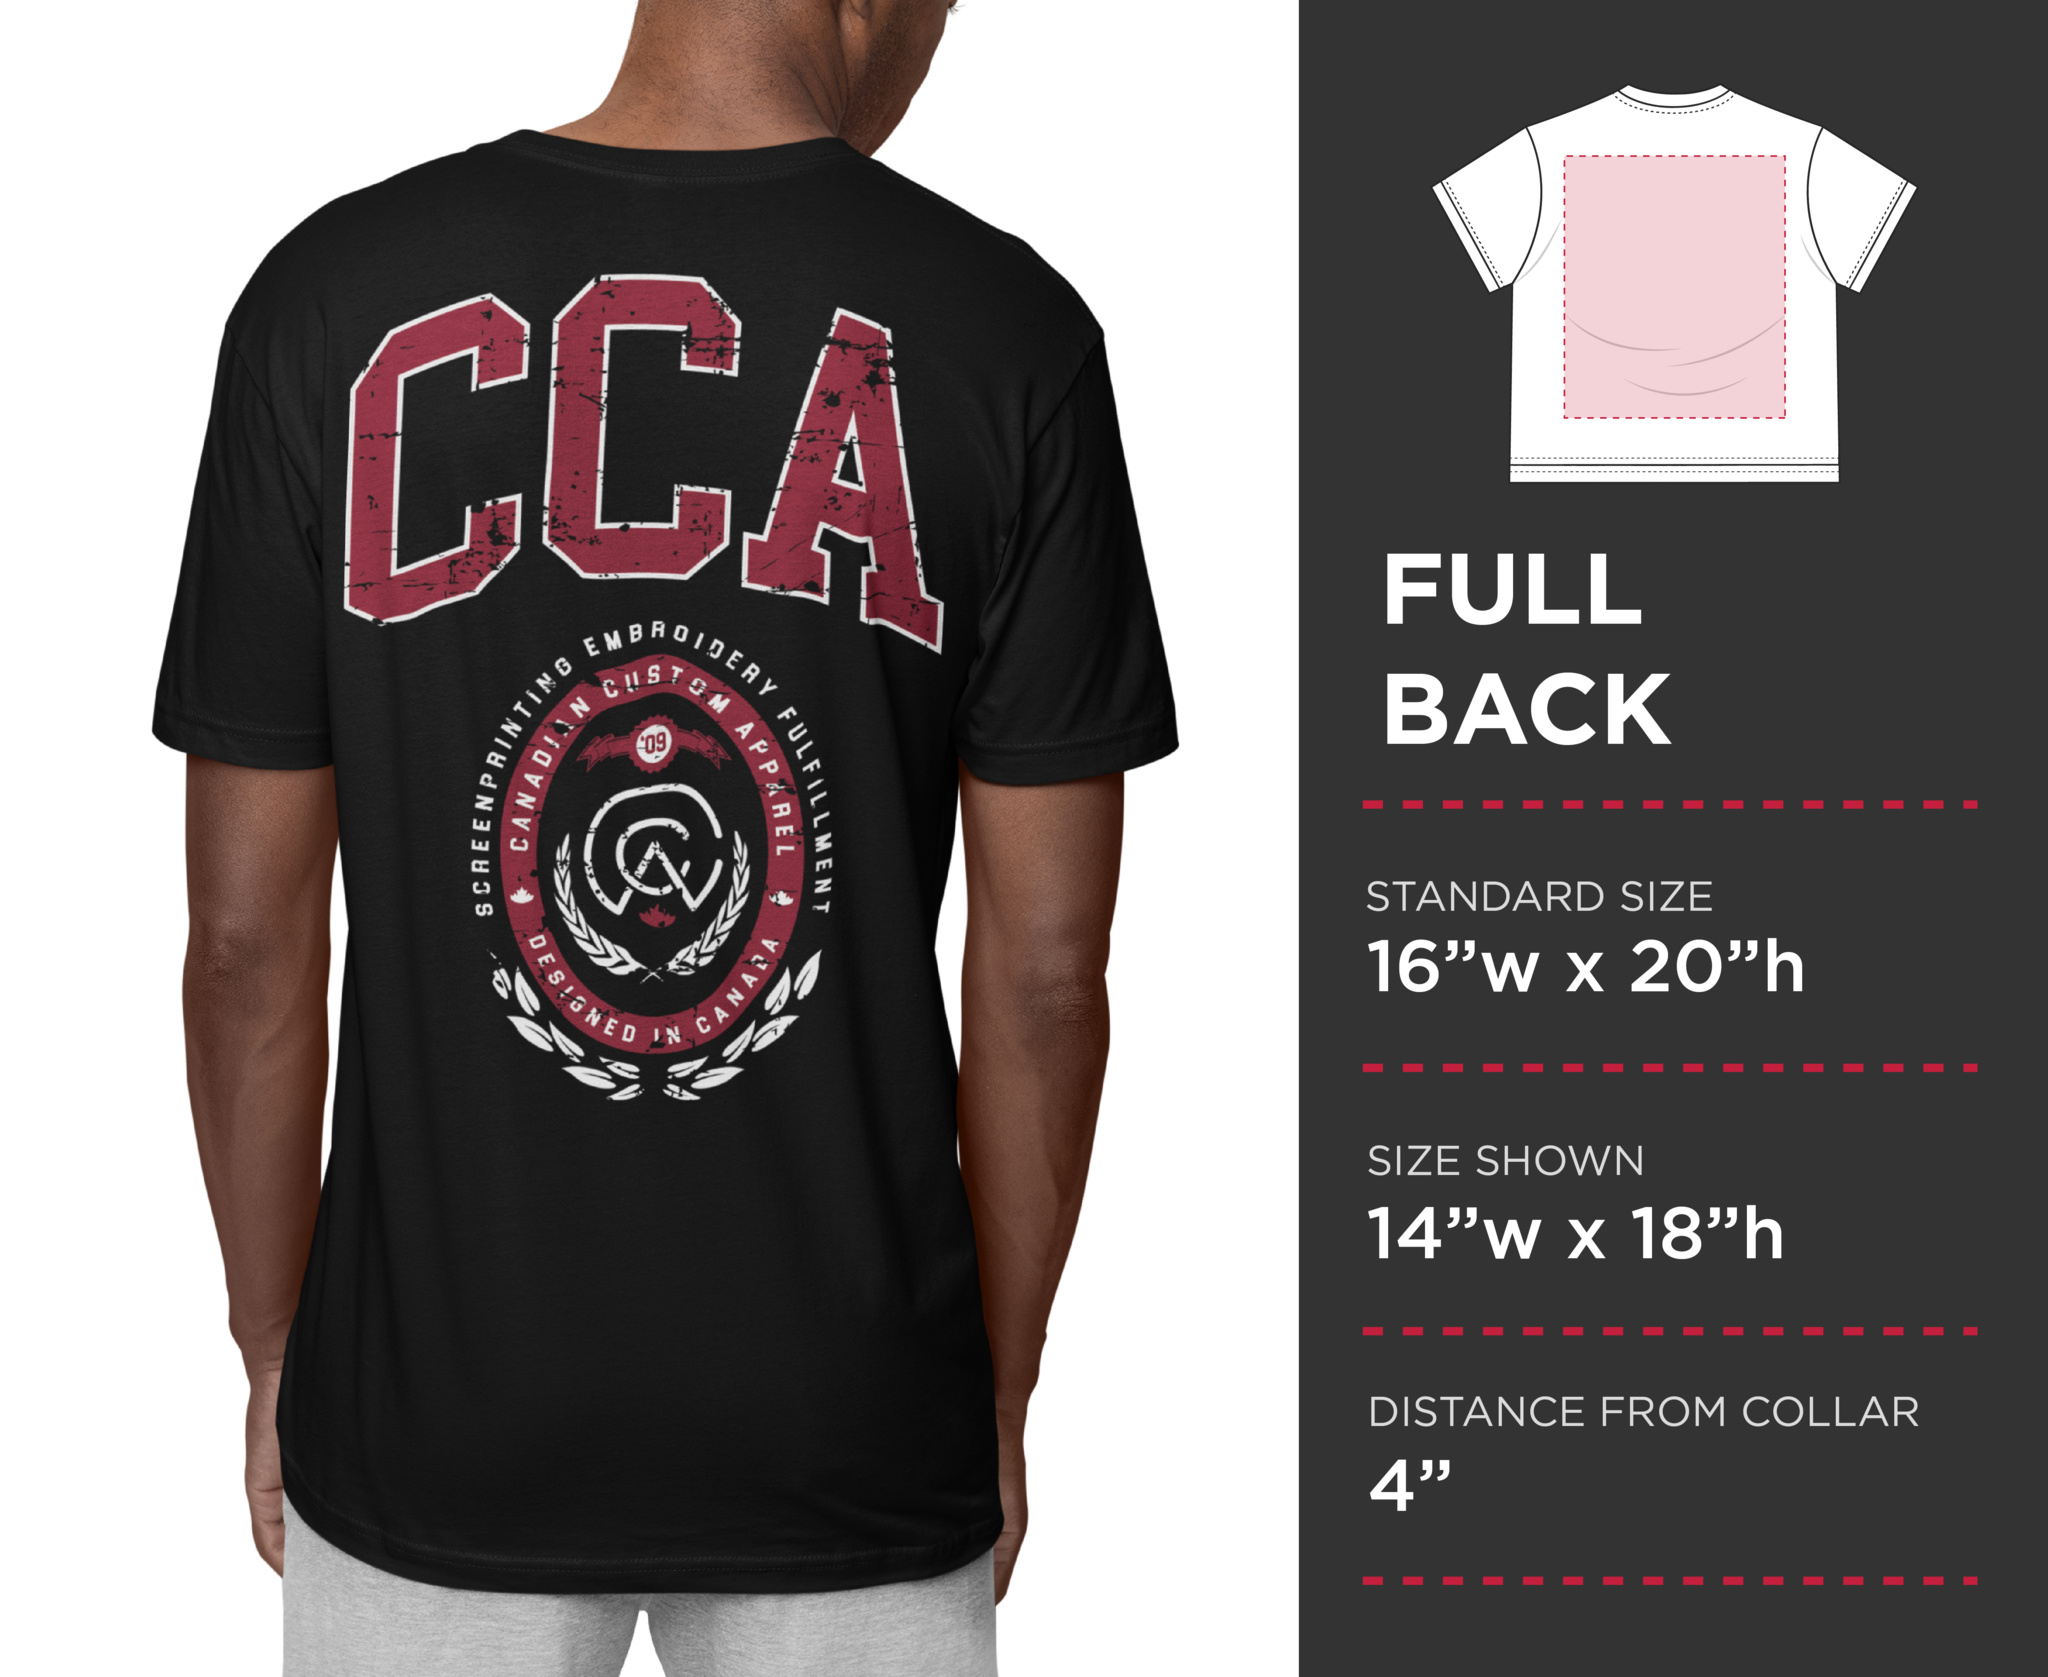
When you want an extra-large print, the full back should be your go-to choice. It allows for a larger image, making it a better billboard than the front.

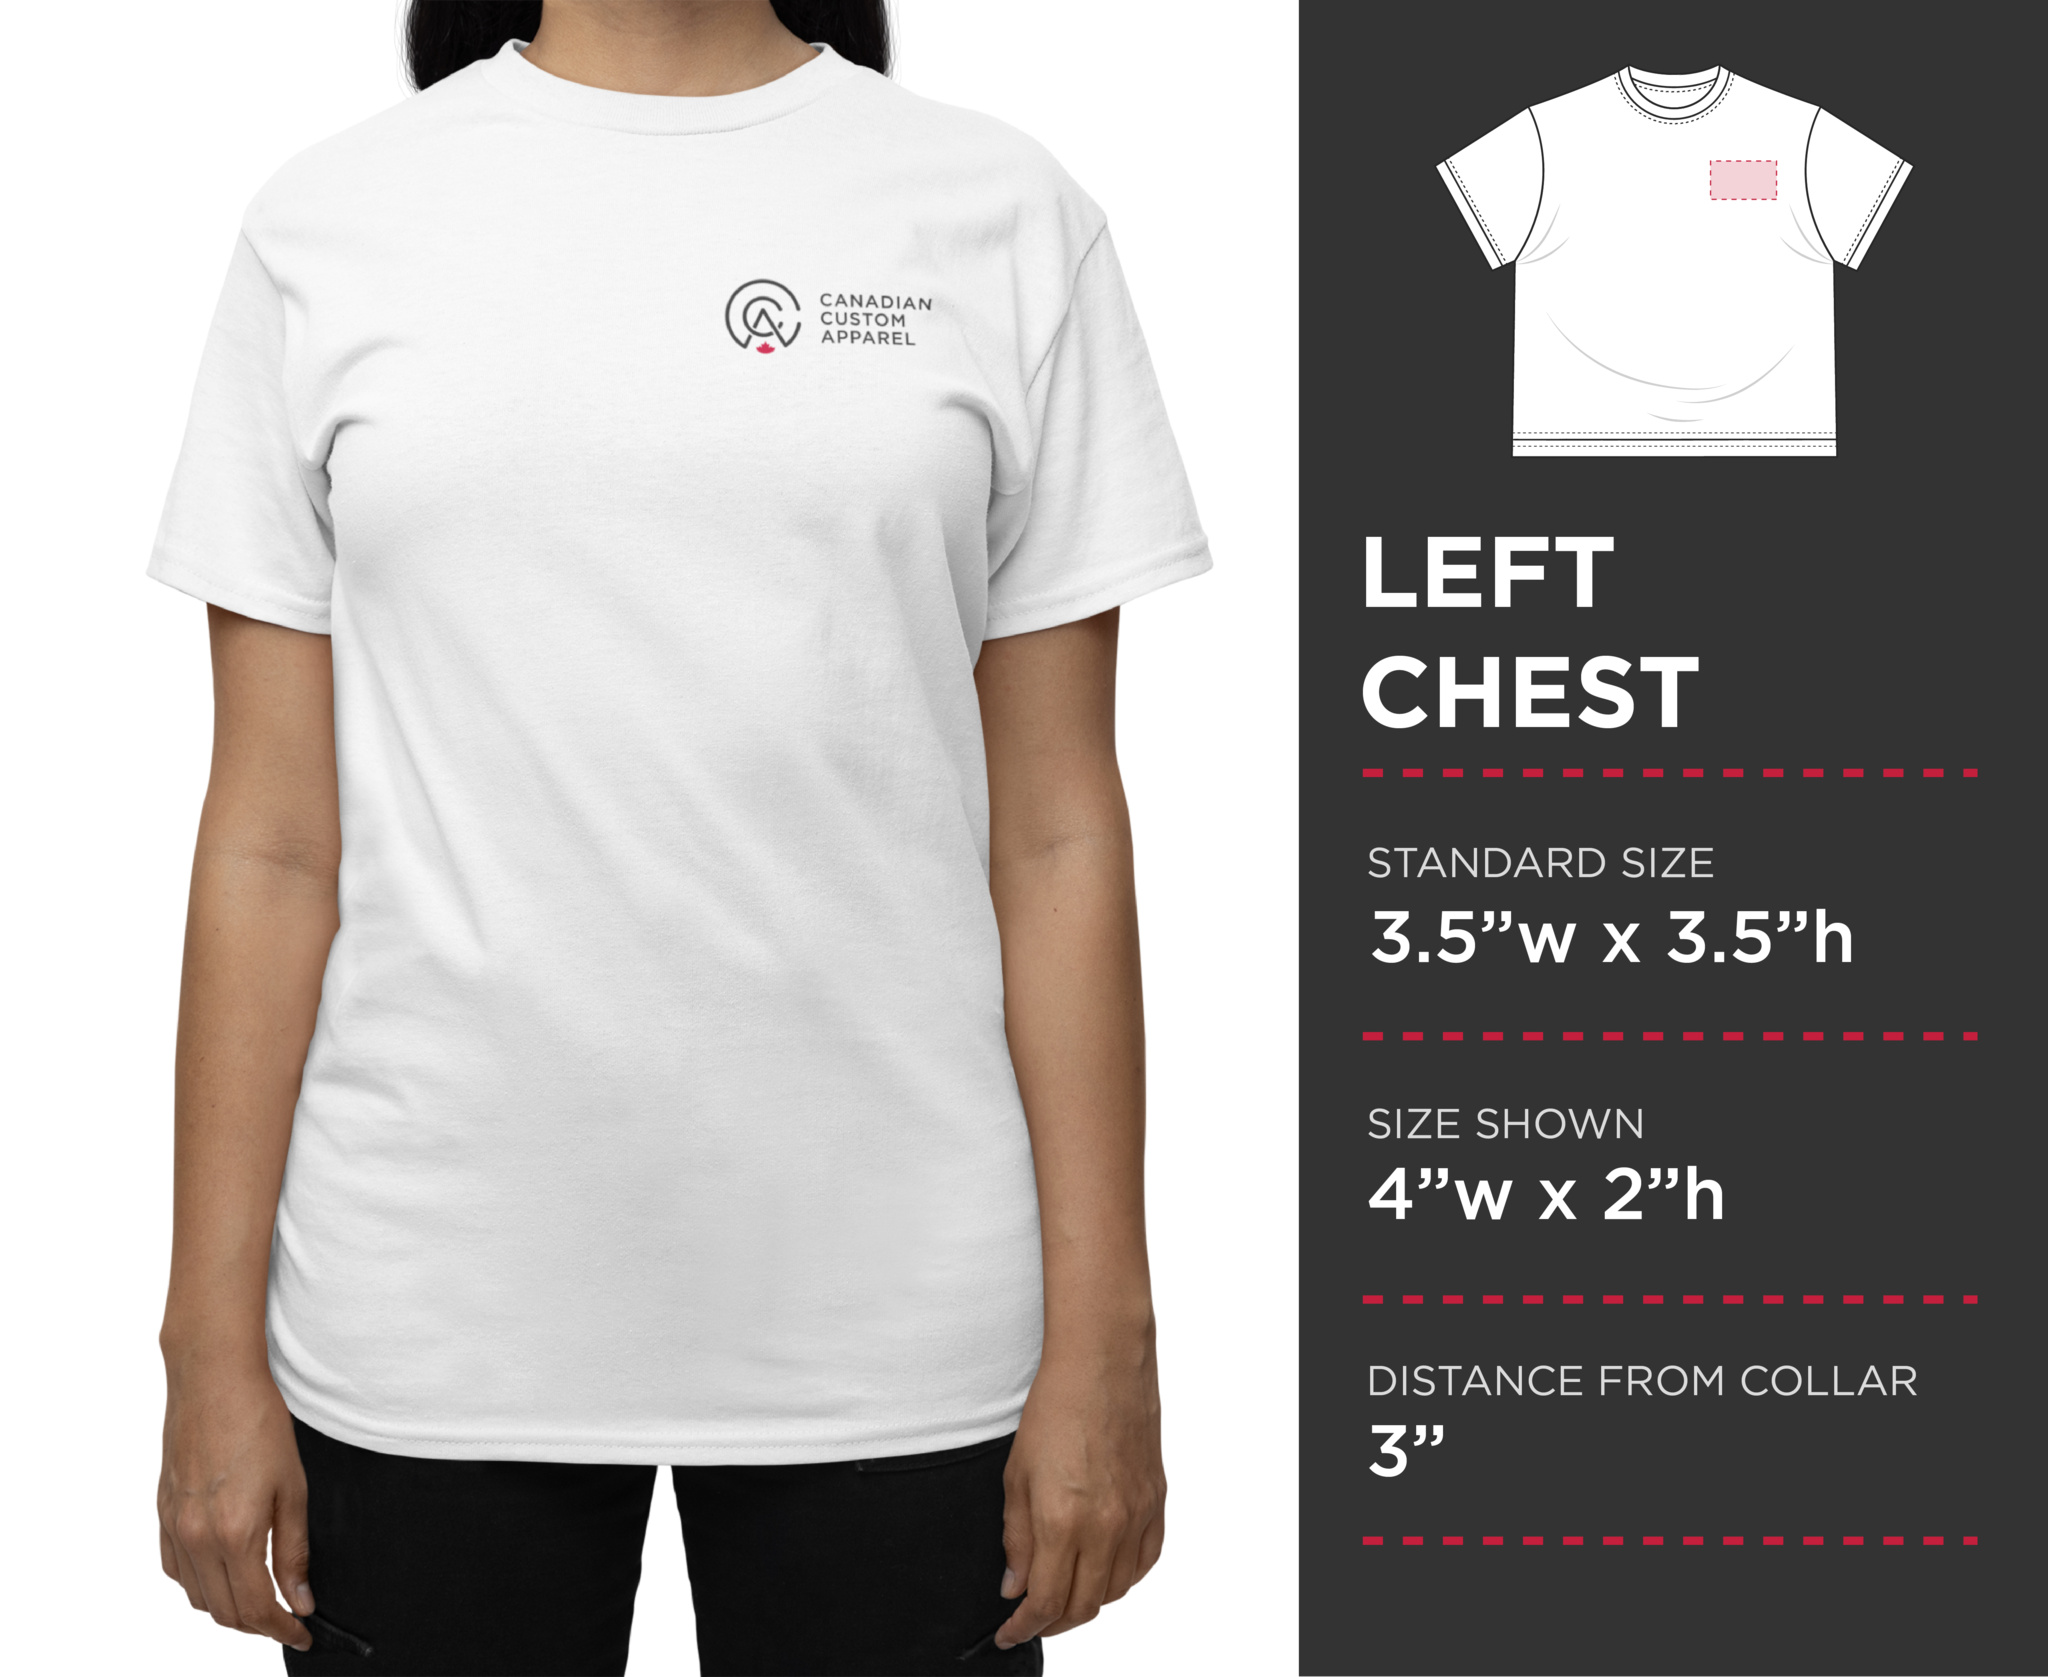
It's also the ideal spot for your most colorful and intricate designs. Reserve the simpler, single-color prints for the left chest and sleeves.

TIP! If you're making T-shirts for an event and have a bunch of sponsor logos to be printed on the back, sponsorship levels are often represented by tiers. Our Art Dept can help you arrange the logos into tiered groups. 

8. SLEEVE

Like the left chest, this print location is best suited for simpler designs. As with other areas, the size and placement should be tailored to your specific logo or artwork.

The sleeve typically looks best with a smaller print size. The standard width is around 3 inches, but we can go up to 4.5 inches wide (though this is only recommended for very wide logos) or as small as 1 inch wide.

The standard placement is about an inch from the hem, but we've seen some great designs printed larger and positioned closer to the shoulder. Use your judgment for this location, and don't hesitate to consult one of our project specialists for guidance.

Now that you're a print location expert, are you ready to perfect your design? Explore some of our most popular, high-quality T-shirts below and get started!

DESIGN LAB
Your cart is empty
Search
Search